Saturday, May 21, 2011

Double Brew Day! Rapture Red Ale and Hop(e)fulness IPA

We're becoming big fans of the British pale malt Maris Otter, and both of our recipes today called for much of it. We read up a bit and used it first in our Smiling Sky. The subtle variation and bit of nuttiness imparted by Maris Otter compared to standard 2-row pale malts has been a nice element to set some of our recipes apart from the big breweries out there. They tend to shy away from MO because of it's greater expense for commercially sized batches.
Marshall's recipe of the day was Rapture Red Ale, named to commemorate the brew day coinciding with the predicted day of the rapture, May 21, 2011. Of course, we all ended up surviving, and this Irish Red Ale poured this brilliant reddish amber after the first and second runnings. 
Chris made some quick notes regarding grain absorption and loss. We strive to come as near to perfect as we can in our volume and temperature estimates, so we take efforts to document the little variables which help us do that. Today we did a great job hitting our mash and sparge temperatures, hopefully making Rapture Red Ale a malt-oriented showcase. 
All finished and beginning to ferment, Rapture Red Ale sits in our new freezer. We're thrilled to have added this to our collection of brewing equipment. Inside our ales will sit at the precise fermenting temperature we set, and later on we can lager! 
We're always thrilled to have visitors on brew day. We give the brief tour, talk about our method, and share some of our past brews. A day at the Bright Spot homebrewery is always a good one! 
Chris' own recipe (the first designed entirely by him) was a dark IPA called Hop(e)fulness. The runnings show that this will be a dark ale, hopefully with many of the characteristics of an IPA. Good amounts of Centennial and Chinook make up the late hop additions in this one.

Saturday, April 30, 2011

Double Brew Day! Smiling Sky and Ahimsa Amber

This brew day would be double the fun, and double the work! Up first was a reprise of our Smiling Sky Summer Pale Ale, then we'd try a new recipe, Ahimsa Amber Ale, named after the Sanskrit word which embodies a philosophy of non-violence in body and mind.

In the Ahisma we'd work to correct a number of dissatisfying results of our previous amber, Laughing Hyena.
Exacting our mash and sparge temperatures has been a bit difficult for us thus far. So we continue to seek out guidance on this tricky issue, including various temperature and volume calculators. Each one offers slightly different numbers, so we press on, ultimately knowing that we'll have to develop our own system based on our own equipment and method.
Right in the middle of heating our sparge water for the first batch - another batch of Smiling Sky - the burner quit! We could not figure out what was going wrong, and it took two long trips to the nearby hardware store to finally get back into the process. The final solution: getting a new burner!
For Smiling Sky, the hop presence is what won us over, so the same schedule would be replicated for the second batch. Here bags of Simcoe, Centennial, and Cascade are prepared for their additions.
Despite the mishap with the burner and some more difficulty with mash temperatures, we got our original gravity after the boil within one point of where the first batch was, leaving us pretty pleased in our capacity to replicate a favorite recipe. We'd have to wait for the final results, though, to confidently declare that we could reproduce a recipe.
While preparing for the batch of Ahimsa Amber, we worked on polishing off the previous amber, Laughing Hyena. We knew for Ahimsa we'd want a much more malty profile and rich mouthfeel. Again, mash temperatures would be the key.
One minor edition to the Smiling Sky recipe was using Safale dry yeast instead of the White Labs liquid. We were curious to see what differences it might produce, though they are of the same strain, so it may not be different at all.
With some frustration and confusion, we were low on our mash temperature for Ahimsa, a factor which we hoped wouldn't end up killing the characteristics we were hoping for. So in order to hit our sparge temperature correctly, we overshot the estimates by a pretty significant degree. For even more confusion, we were still low in that respect as well!
One pleasant find was the nice deeper color of the runoff for Ahimsa. Quite a few specialty malts, including a dash of chocolate and some Belgian biscuit malt, were involved in this recipe, with the intent of making it complex, interesting, and malt-oriented. At the last minute we excluded CaraPils, after which we wondered if we'd made the right move.
For Ahimsa, we worked with some hops we had yet to try out. While the Willamette was familiar from some commercial beers, Perle was one variety with which we had no experience. Experimenting with things like this makes this process a lot of fun!
Look at that rich color! And look at that gravity! We were a bit high on that, so we added some cold water after the boil to get it down to our target: right around 1.054.
After cooling, Ahimsa flows out of the kettle into the fermenter. We didn't want to bother with aerating, but this long pour likely helped with that.
Our new eight-gallon fermenter filled with Ahimsa Amber!  We hoped to avoid any blow-off (a problem with the last batch we used dry yeast) and give us some room for bigger batches in the future. It also allowed us to do two batches today, which was a fun challenge.
After kegging,getting some good carbonation, and aging for a week, these two turned out okay. Smiling Sky was as expected, and many of the deliciously citrusy qualities we enjoyed the first time around were well replicated. As for Ahimsa, we were missing some important elements, mostly thanks to missing our mash temperatures. Even for the mildly hopped amber, the malt profile was weak and the body light, making it a bit less than we hoped. We continue to learn and improve our method, and the next batches will certainly top these in a number of ways. Cheers to progress!

Sunday, April 3, 2011

Laughing Hyena Amber Ale

After the success we enjoyed with our summer pale ale, Smiling Sky, we felt confident going into this batch. We wanted another keeper, this time a rich, interesting amber ale we deemed Laughing Hyena. The grist included some cool specialty malts, like "Special B" and some neat German strains. In the boil we included the outer peel of a California navel orange to hopefully add even more dimension.
A bit paler and thinner than we had hoped, Laughing Hyena was decent but not what we were looking for. The orange dominated the profile, and we wondered if missing our mash temperature hurt the body and killed some of the malt characteristics. 

Sunday, March 13, 2011

Smiling Sky Summer Pale Ale

Happy Head Brewing continues to grow! Our first batch to keg and have on tap is a hopefully very citrusy, refreshing pale ale. The Citra hop was elusive, so we used some quick substitutions which should do the job and be a bit more complex than a single hop recipe (though we still want to try that one day).
This batch benefited from a small investment: a wort aerator. This little stone is full of millions of 0.5 micron holes through which filtered air will boost the oxygenation of the wort, hopefully helping the liquid yeast do its job more efficiently.

In a few weeks the pale was ready to keg and carbonate. 
Now that's a pretty pale! We were looking for a citrusy ale, and citrus is what we got. The aroma of this beer is like holding a bag of fresh cascade hops to your nose! We also nailed our final gravity target, helping us feel a bit more accomplished in the technical side of things.
Smiling Sky Summer Pale Ale, glowing in the sun, right where it should be enjoyed. This one has been a treat to sample and over the weeks of dry hopping, the bouquet has only improved. It's a crisp, clean, refreshing summer-time pale, and hopefully the first in a long series of beers to get added to our keeper list.
We collaborated on the design and Chris put the digital skills to work to create the logo, a must for any respectable beer that plans to stay in the rotation. More about this recipe can be found on our keeper beers page, found here.


Saturday, February 19, 2011

American-Style India Pale Ale

The Happy Head home-brewery on it's inaugural brewing day. Added to our arsenal this time around is a 15-gallon boil kettle and a home-made mash tun which would allow us to switch to the "all-grain" brewing method. We had been looking forward to this for a while, and so after only two extract batches, we waved goodbye to liquid extract forever. The first all grain batch would be an IPA in the American style, strongly emphasizing hop character but hopefully staying balanced.
We couldn't wait to try out this mash tun and get familiar with the all-grain method, which we knew would help us gain much more control over the process. 
After dough-in we mashed for a few minutes to get everything saturated and break up any dough balls which had formed.  One big error we knew would impact the results was an erroneously long sparging process. We hit the already mashed grains with much hotter water and then let it sit for an entire hour (we accidentally repeated the mash rest), so our first all-grain experiment was not without some mistakes.
After the hour-long mash, before letting the runoff into the kettle, we captured some "vorlauf" to recirculate to the top of the grain bed. 
The 15-gallon kettle allowed us to do a "full boil," so the entire wort is included in the kettle. It was a cool evening and a lot boiled off, but we were pretty close to the volume we expected.
We prepared a yeast starter in a growler and had a big volume to pitch once we chilled the wort. 
In a wonderfully synchronous way, our first all grain batch would also be our first batch on tap. We invested in a brand new, beautiful two-tap kegerator, and we can't wait to use it.
We research various strategies for force carbonating, and a few weeks into the fermentation, we racked into the keg and hit it with gas. We rocked it for about 30 minutes to help it carbonate, mostly because we were impatient to try it! After a couple hours, we hurriedly poured a glass, and of course the carbonation was still pretty lacking.
We debuted this batch at Marshall's 30th birthday party, which was a blast! As a gift, Marshall's twin brother, Marco, got him a set of glasses with the Happy Head logo. Party guests could chip in for the next batch and walk away with a cool souvenir.
The party was a great time, but the IPA turned out a bit less than we had hoped. It was heavy in bitterness and very alcoholic, which in and of itself was hurting the drinkability in a big way. Then, the hour long sparge definitely drew out some tannins and made this beer very drying and puckering in the mouthfeel. Our friends of course offered positive reviews, and it certainly went quickly, but we knew we had much to learn in the brewing process.

Monday, January 24, 2011

Pale Ale (extract)

Ingredients for our second (and last) extract beer, a pale ale which we worked to keep simple and clean. 
For this batch we also invested in a propane jet burner, so we could more rapidly heat our water and keep our boil rolling without relying on the stove.

An investment which would make a big difference this time around was a brass wort-chiller. In our first brew, the cooling process took well over an hour, and this time it would be remarkably rapid, only a few minutes!
Being numbers geeks, we knew we'd want to know the actual gravity of our beers. We wanted to take the brewing process seriously in terms of knowing gravity and final ABV, so a refractometer would do the trick.
After a few weeks in the bottles, the carbonation was spot on and we were finally able to get some feel for the results. Right away we could tell there was something "off" about this one. Despite our efforts to develop a pale ale, there was a distinct wheat-like quality to the body and the familiar aroma of a hefeweizen. We could not determine an explanation for this, except to wonder if somehow the online supply store sent us the wrong yeast strain and we didn't notice?

Friday, January 21, 2011

Converting a Cooler into a Mash Tun

Like most novices, we approached the process of home brewing in the most simple way by using malt extract, which eliminates the need to extract the sugars from the grain ourselves (see prior post for more detail about this process). The upside to this approach is that it is quicker and less complicated; the downside is that it limits the amount of control brewers have over the final characteristics of their beer. The alternative to extract brewing is called all-grain brewing whereby the brewers are responsible for “mashing” and “sparging” their own grain. Basically, mixing extract into hot water is replaced by a process of soaking much larger quantities of milled grain to release sugars (mash) then rinsing those sugars off the grain (sparge). The rest of the process is similar to that of extract brewing: boil, add hops, cool down, add yeast, let ferment, bottle/keg, wait... DRINK!

We decided, after brewing only one batch with extract (IPA), it was time for us to go all-grain (we had already purchased the ingredients for a second extract batch, Super Pale, which we weren’t about to waste). This is a project we were initially somewhat afraid to take on, as it just seemed too complicated and expensive. We couldn't have been further from the truth. After researching the various methods and materials, we found that a very good mash tun could be easily fabricated out of relatively inexpensive materials- we spent about $80.

We probably read over 15 different methods for converting coolers into mash tuns- some offered instructions that seemed unsanitary and flimsy, while others seemed a tad over the top. We blended the best aspects of the few we thought looked good and here is what we came up with:


First, it is important to decide what type of cooler you are going to convert and it is imperative you choose one that has a removable spigot (almost all cooler spigots, when removed, leave a hole with a ½” inner diameter). While the 5 gallon round coolers are a popular choice, many people choose to use larger rectangular coolers for greater volumes of beer. We went with a 48 quart (12 gallon) Coleman cooler. Whatever cooler you choose to use, the mash tun assembly can be easily removed and placed in another cooler at any time!

Mash Tun Parts:
1.      Cooler (if used, make sure you thoroughly clean it prior to first batch J)
2.      1 ½” Brass Threaded Ball Valve
3.      (2) ½” Barb x ½” MIP Brass Hose Adapter (Watts A-385)
4.      ½” Barb x ½” FIP Brass Hose Adapter (Watts A-390)
5.      ½” x 1 ½” Brass Pipe Nipple (Watts A-836)
6.      ½” Brass Female Pipe Cap (Watts A-819)
7.      (3) ¼” Stainless Steel Hose Clamps
8.      (3) ¾” Stainless Steel Flat Washers (these are not easy to find on their own; however, you can purchase a ¾”Create-A-Bolt set for about $5… found in every Home Depot and all stainless!)
9.      (1) ½” diameter Stainless Steel hose from 12” to about 4’ long- many people go with the less expensive 12” supply hose; we chose the 4’ washing machine fill hose for about $10 (Eastman 98503)
10.   (2) ¾” ID Rubber O-Rings with 1/8” wall (#15)
11.   About 4’ of food grade plastic tubing (3/4” ID)
12.   Teflon plumbers tape


STEP 1: Prepare cooler
Ø  Unscrew spigot from cooler making sure to leave the white washer (this not only helps to prevent leaks, but makes for a more secure fitting assembly).
Ø  Clean the area around the removed spigot with warm water (this is particularly important for used coolers that are being repurposed).

STEP 2: Prepare stainless steel hose
Ø  Cut both ends off of the stainless steel hose (part #9). This can be accomplished by using a pair of sharp wire-cutters (easiest and cleanest) or a hacksaw. I recommend wrapping tape around the ends prior to cutting to help keep the hose together.
Ø  Using a pair of needle-nose pliers, grab the inner plastic tubing and gently push the stainless steel mesh down the plastic tubing. DO NOT pull the mesh from the bottom! If you’re too impatient, you might mess up the mesh hose.
Ø  Slide 2 hose clamps (part #7) onto the stainless steel hose.
Ø  Insert the barbed end of the FIP brass hose adapter (part #4) into one end of the stainless steel hose and secure it with a hose clamp.
Ø  Insert the smaller end of the pipe cap (part #6) into the other end of the stainless steel hose and secure it with the other hose clamp.
Ø  Set the completed hose assembly aside.


STEP 3: Assemble drainage system
Ø  Wrap plumbers tape around the threaded end of one of the MIP brass hose adapters (part #3) and tightly screw it into the longer side of the ball valve (part #2)- see photo for clarification.
Ø  Slide the plastic tubing (part #11) onto the barbed end of the MIP Brass Hose Adapter that is attached to the ball valve and secure with the final hose clamp.


Ø  Wrap each end of the brass pipe nipple (part #5) with plumbers tape and insert it into the cooler’s spigot hole- this will require some pressure and patience so as not to push the white washer through the spigot hole.
Ø  Place an o-ring (part #10) on both ends of the pipe nipple.
Ø  Place 1 washer (part #8) on the external portion of the pipe nipple and 2 washers on the internal portion of the pipe nipple.
o   It is possible some folks won’t require this many washers, as they are used simply to allow for more secure fastening of the parts. Should you require less, I recommend first trying 1 washer on either side; if there’s still no pipe nipple left, you can remove the washer from external portion of the nipple.
Ø  Screw the ball valve assembly onto the external portion of the pipe nipple (might be easier if you remove the plastic tubing).


Ø  Screw the stainless steel hose assembly onto the internal portion of the pipe nipple (might be easier if you remove the stainless steel hose from the FIP brass hose adapter).


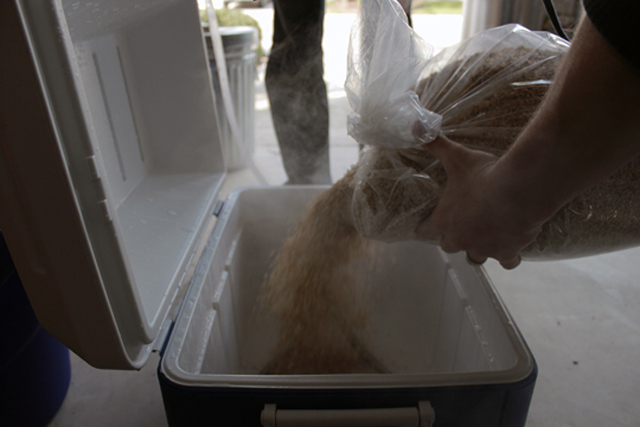
That’s it! Test it all out by filling the mash tun with a few gallons of water and flipping the valve “On.” If you notice some leaking, it could be either the ball valve and/or the hose assembly were screwed on too loose… or too tight (too much pressure on an o-ring causes them to malfunction). If you’re getting minimal dripping, it’s probably not an issue.

Cheers!